On this page you will find support for decapsulation applications, a glossary of fixtures and terms, part numbers for etch fixtures, and other general information related to operating Nisene equipment.
Understanding the decapsulation fixtures for the JetEtch Pro and using them as intended is an essential step to maximizing the efficiency and decapsulation potential of your system. This page will illustrate the standard etching fixtures available, along with several different decapsulation stack-ups that one might encounter when using the JetEtch Pro. You might find that customized versions of these stack-ups work better for your application.
Have a look at the illustrations of several of our standard etch fixtures below. Feel free to rotate them and view larger images to get the full detail on each fixture.
Most of these etch fixtures are available for purchase at our online store, shop.nisene.com. Our online store is available for anyone with Nisene decap equipment as a small part of our value-added service.
Using the 3D carousels, have a look at our various types of gasket designs by dragging your mouse and spinning the image. You may also wish to enlarge the image and use the carousel in full-screen mode. Use the expansion arrows () to do that.
Using the 3D carousels, have a look at our various types of etching fixtures by dragging your mouse and spinning the image. You may also wish to enlarge the image and use the carousel in full-screen mode. Use the expansion arrows () to do that.
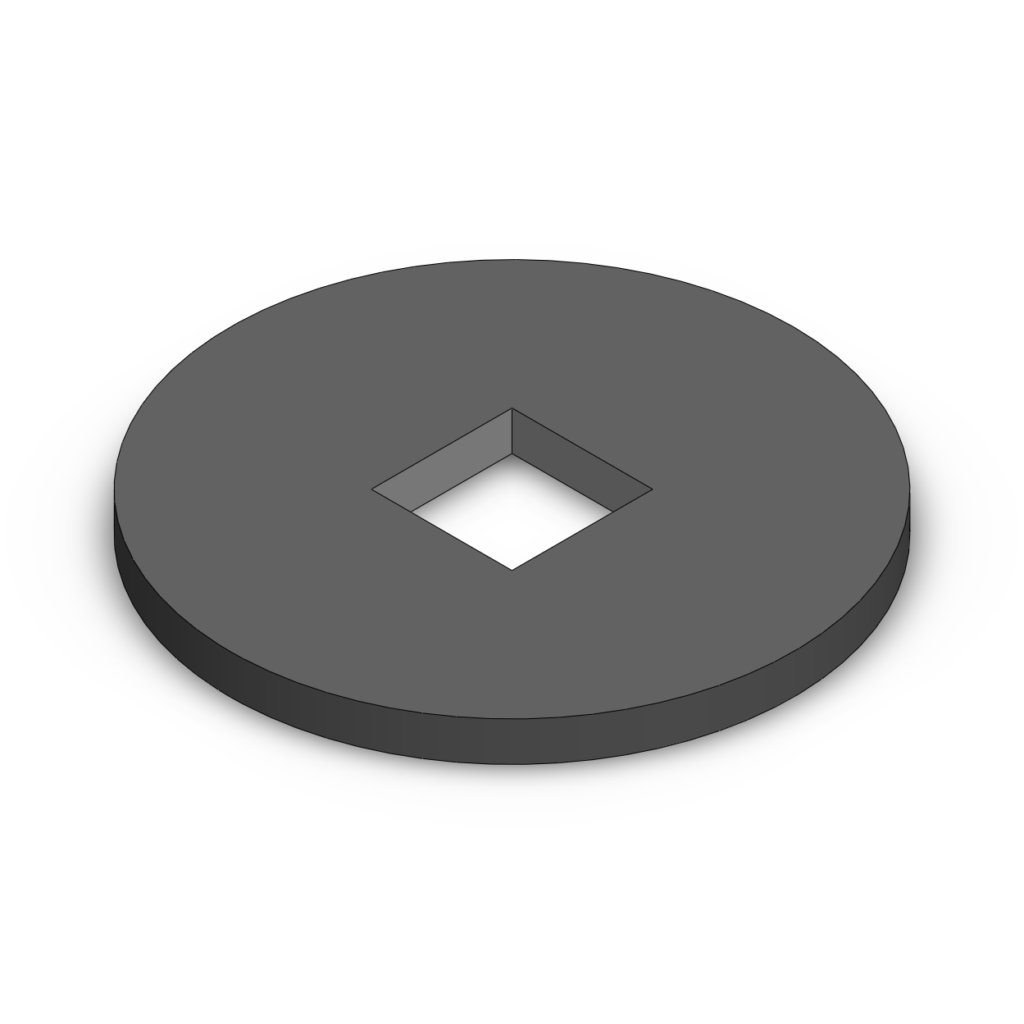
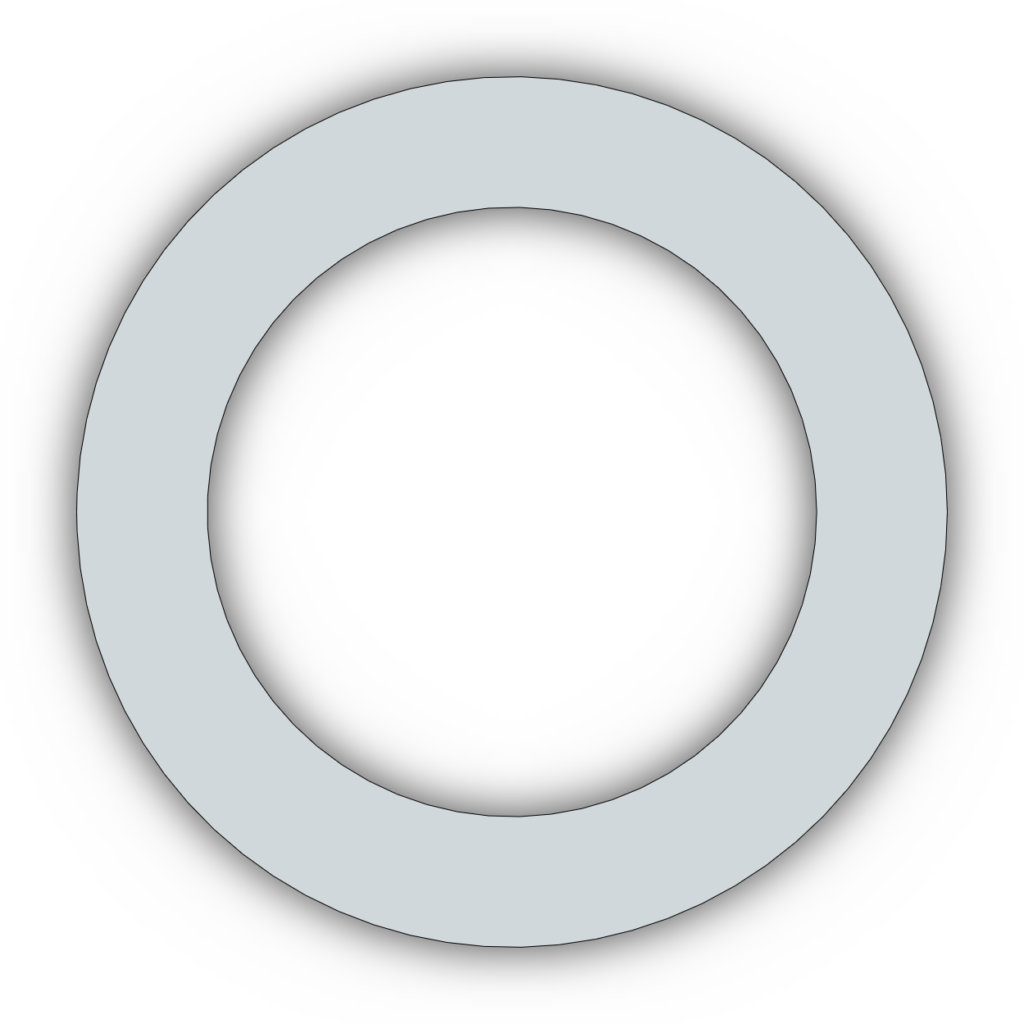
The Location Gasket is used to align the sample above the Definition Gasket during the etch process. It locates the sample in its place; hence the name “Location Gasket.”
Location Gaskets are just slightly larger than the perimeter of the IC device’s outermost sidewalls. Note, however, that some packages require location by way of sidewall, leads, or both — so inspect and measure your part carefully when choosing a Location Gasket. If you need help selecting the best Location Gasket for your application, just contact our applications department and we’ll gladly help.
Location Gaskets are approximately .032” thick.
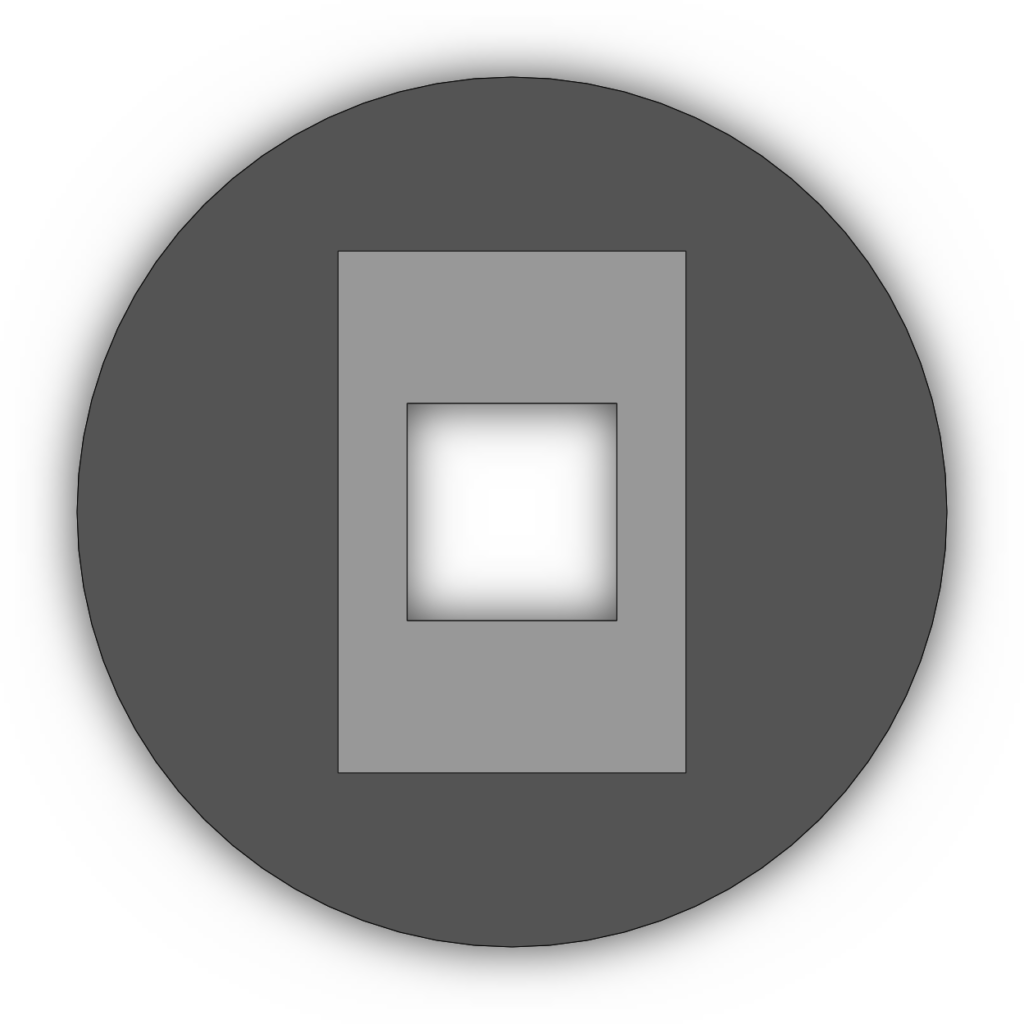
The blank gasket is used to run a blank part and other etch and maintenance processes. They can even be used to create custom gaskets. They come in two outer dimensions (1.00″, 1.38″) and two thicknesses (Definition, .070″; Location, .032″). A pack of five of each type is included in each Basic Accessory Kit (0300600) that ships with every system.
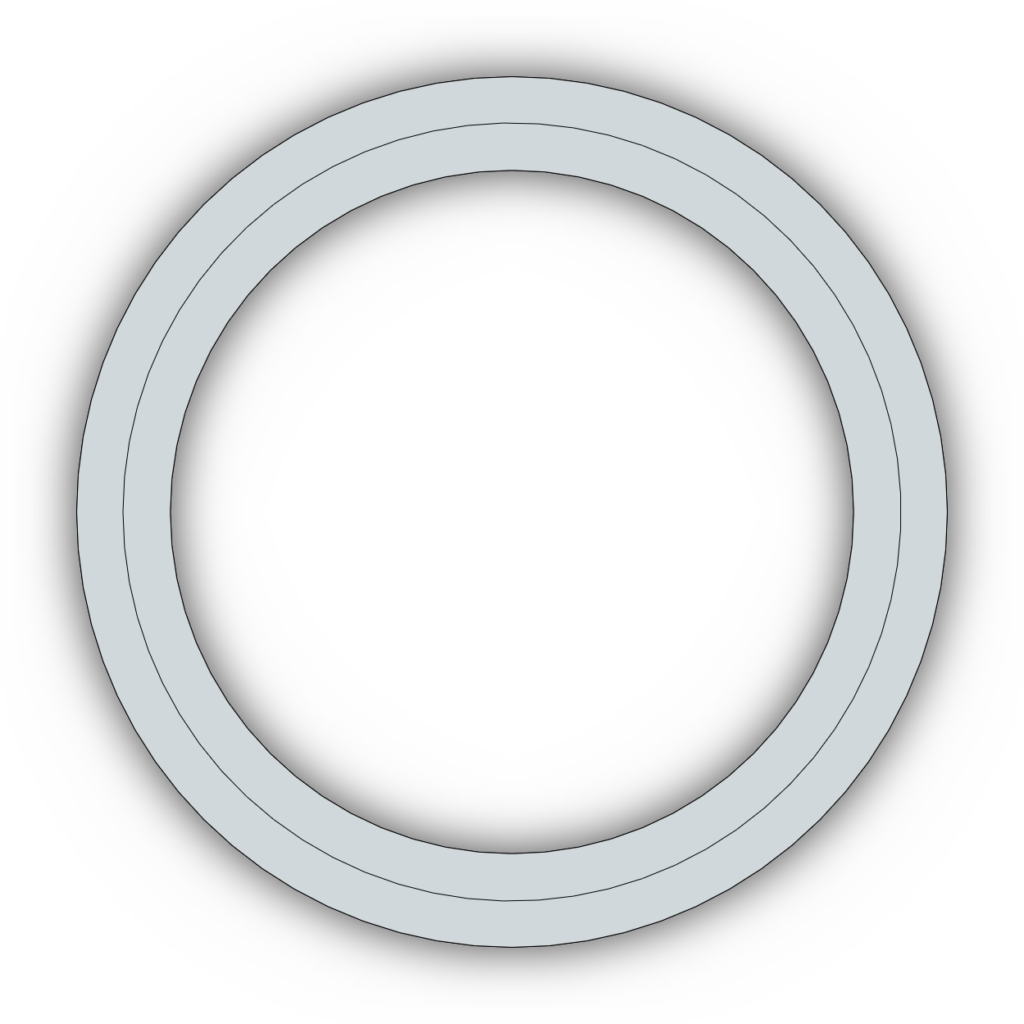
The Monolithic Gasket is a singular gasket that combines a Definition Gasket and Location Gasket into one. Monolithic Gaskets are custom-designed and most effective for samples that require extreme precision in the decapsulation result. Monolithic Gaskets are approximately .115” thick.
The Stepped Gasket is a raised-lip gasket used for the decapsulation of die-down BGA samples. Stepped Gaskets are approximately .115” thick.
The etch head is where the acid escapes the heat exchanger assembly on its way to the surface of the sample being etched. It also has ports for transporting the waste acid to the waste acid bottles.
The Teflon® blank spreads the force of the ram nose evenly across the backside of the sample during the etch process. The Teflon® blank also is used in the process of running a blank and other processes.
The Teflon® blank is included in the Basic Accessory Kit (0300600) that ships with every system.
Much like the Teflon® blank, the aluminum blank spreads the force of the ram nose evenly across the backside of the sample during the etch process. It is also a critical component to conducting the bias to complete the circuit during etches used with the CuProtect and TotalProtect where the bias is activated and copper wire preservation is desired.
The aluminum blank is included in the Basic Accessory Kit (0300600) that ships with every CuProtect and TotalProtect system.
The ram nose applies pressure to the stack-up during the etch and other processes. They come in three different lengths to allow for various package thicknesses and stack-up variations. All three are included in the Basic Accessory Kit (0300600) that ships with every system.
The ram nose also acts as an electrical conductor for the bias process seen in the CuProtect and TotalProtect models.
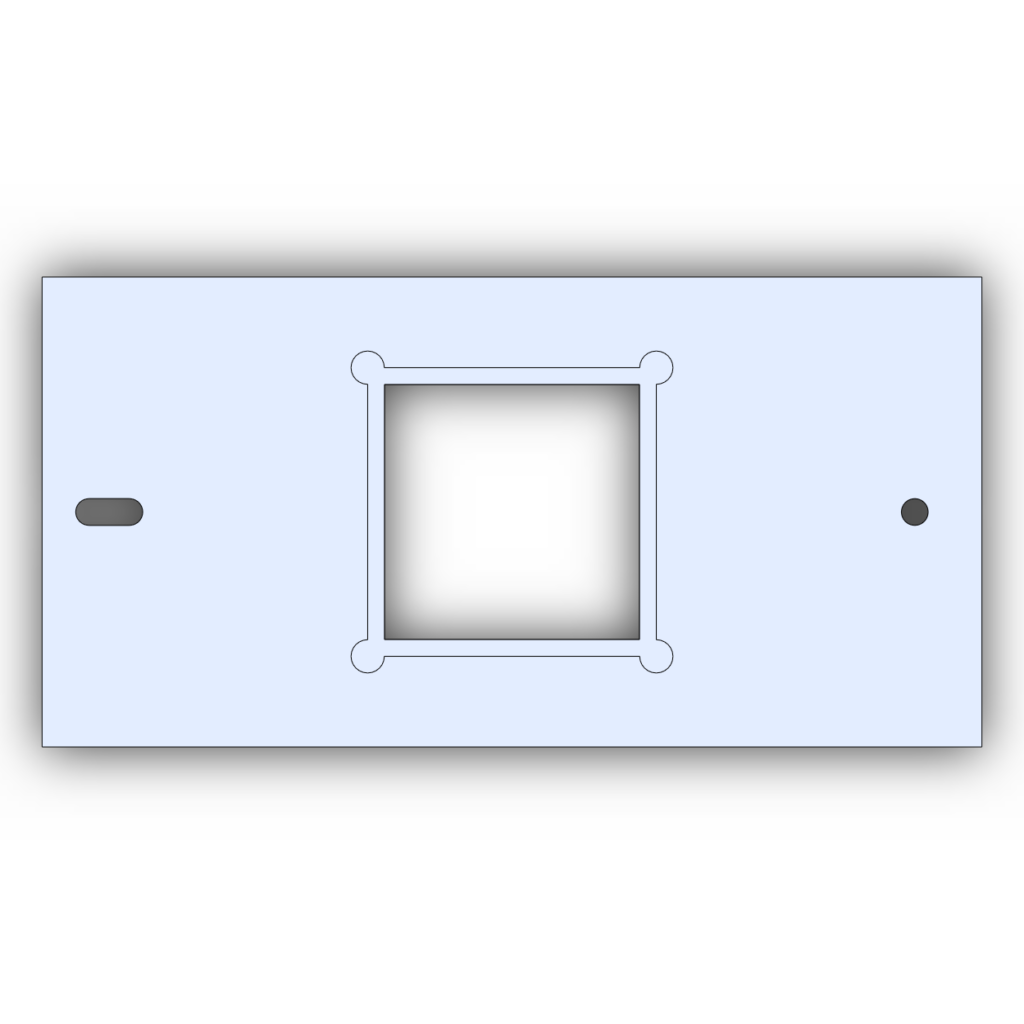
The Alignment Plate aligns the sample to the Definition Gasket during the etch process. The Alignment Plate is usually used for samples with larger package dimensions that don’t fit within the perimeter of the standard Location Gaskets (1” or 1.38” OD), but not necessarily always. Sometimes they’re just more convenient, as they are a universal fixture that can fit many samples.
The example rendering shows an Alignment Plate with a recess for a QFP-type sample. See Alignment Plate stack-up illustration below.
The Locator Ring aligns the gaskets to the etch head. The 1.00″ OD Locator Ring is for the smaller gaskets (1.00″ OD) and is used for most parts, but not necessarily all of them. For larger gaskets, use the 1.38″ OD Locator Ring (see next section).
Note that the 1.00″ OD and 1.38″ OD mount on the etch head slightly differently from each other. Sometimes JetEtch operators try to install the 1.00″ OD version upside-down — and it doesn’t fit that way.
Locator Rings are included in the Basic Accessory Kit (0300600) that ships with every system. They rarely need replacement, but in the event that you find yourself in need of a new one, they can be purchased on our online store.
The Locator Ring aligns the gaskets to the etch head. The 1.38″ OD Locator Ring is for the larger gaskets (1.38″ OD) and is used less frequently than the 1.00″ Locator Ring, but is still fairly common. For smaller gaskets, use the 1.00″ OD Locator Ring (see previous section).
Note that the 1.00″ OD and 1.38″ OD mount on the etch head slightly differently from each other. Sometimes JetEtch operators try to install the 1.00″ OD version upside-down — and it doesn’t fit that way.
Locator Rings are included in the Basic Accessory Kit (0300600) that ships with every system. They rarely need replacement, but in the event that you find yourself in need of a new one, they can be purchased on our online store.
The Teflon® Etch Cup is used to aid in the etching of very small (e.g. SOT-23) samples. Use in conjunction with the Teflon® Etch Cup Cap (next section).
The Teflon® Etch Cup, its cap, and a variety of gaskets comes with our SOIC Accessory Kit (0300603).
See stack-up for small devices below (coming soon).
The Teflon® etch cup is used in conjunction with the Teflon® Etch Cup to apply pressure to the backside of the sample during the etch process.
The Teflon® Etch Cup Cap, its cup, and a variety of gaskets comes with our SOIC Accessory Kit (0300603).
See stack-up for small devices below (coming soon).
The wide ram nose is an alternative fixture to the standard ram nose. Some end users prefer this ram nose to the traditional ram nose, as its built-in pressure-spreading design may eliminate the need for the Teflon® Blank.
The wide ram nose was originally designed and is usually used primarily for smart card etching.
The Smart Card Holder is used exclusively for the etching of smart cards. This fixture aligns the smart card directly over the center of the etch head. Used in conjunction with a Definition Gasket, the Smart Card Holder offers the user a simple and repeatable way of etching all smart cards.
Choose between the 8-contact or 6-contact smart card or purchase them both together along with several popular Definition Gasket sizes in our Smart Card Accessory Kit (0300375).
Below we list a number of common stack-ups featuring accessories and various etching fixtures to provide a visual aid for using our equipment. If you have any questions about how to use or create your own stack-up, please contact us.
The Definition-Location Gasket stack-up is our most common and easily created stack-up. It has been around since the beginning of automated etching, and it still a reliable and quick and easy method for etching parts to this day.
To design your own Definition-Location stack-up, start by selecting a Location Gasket with roughly the same aperture as the perimeter of the device to be etched. Depending on the package type, that might mean the plastic encapsulant only, but sometimes that means a convenient lip or edge in the external leads that can easily be grabbed by the Location Gasket’s aperture. This holds the device steady and aligns it with the acid supply hole in the etch head. Next, select the Definition Gasket that is roughly the same size as the die (or desired area of interest; e.g. the die and second bonds). Once you have both of these gaskets selected, you can use a light adhesive to secure the two gaskets together. Nisene recommends vacuum grease for this temporary adhesion. Vacuum grease comes standard in every Basic Accessory Kit, which is included with your JetEtch Pro series decapsulator.
Note: you may wish to use a Teflon® Blank to apply pressure to the stack-up. We’ve included an illustration of this as well.
Many of our Accessory Kits feature a variety of Definition and Location Gaskets so that the end user can create their own custom configuration and etch quite a large number of combinations of devices and die sizes. With hundreds of Location and Definition Gaskets in stock at all times, as well as the ability to create your own custom sizes, there is literally an infinite number of customizations an end user can design to arm them with the capability to etch just about anything.
When the Definition-Location Gasket stack-up isn’t enough and you require ultimate precision for your etch, look no further than our Monolithic Gaskets. Cut from a single piece of material, the Monolithic Gasket combines the Location and Definition Gasket to create a very customized etch fixture. With the Monolithic Gasket, one can create a perfectly snug fit to hold the sample, as well as a Definition cavity to define the etch cavity exactly as you need.
Another great feature and capability of the Monolithic Gasket is the ability to create an offset in the Location cavity for parts that have die that are off-center.
Monolithic Gaskets are made by our experienced applications team, whose decap tenure exceeds two decades. The finest CNC milling equipment is used to manufacture the gaskets, which are available for purchase in packs of five.
Note: you may wish to use a Teflon® Blank to apply pressure to the stack-up. We’ve included an illustration of this as well. (coming soon)
The Alignment Plate stack-up is one of our most common and easily created stack-ups, second to the Definition-Location Gasket stack-up in the previous section. Like the Definition-Location, it has been around since the beginning of automated etching, and it also still a very reliable and quick and easy method for etching parts to this day.
To design your own Alignment Plate stack-up, start by selecting an Alignment Plate with roughly the same aperture as the perimeter of the device to be etched. This is typically the edge of the package itself. The Alignment Plate holds the device steady and aligns it with the acid supply hole in the etch head as well as the Definition Gasket.
Next, select the Definition Gasket that is roughly the same size as the die (or desired area of interest; e.g. the die and second bonds). When you’re ready to etch, set the Definition Gasket on the etch head. Follow this by setting the Alignment Plate and device to be etched above/on top of the Definition Gasket by aligning the alignment pins with the holes on the outer edges of the Alignment Plate.
Many of our Accessory Kits feature a variety of Alignment Plates and Definition Gaskets so that the end user can create their own custom configuration and etch quite a large number of combinations of devices and die sizes. With thousands of fixtures in stock at all times, as well as the ability to create your own custom sizes, there is literally an infinite number of customizations an end user can design to arm them with the capability to etch just about anything.
The BGA Alignment Plate stack-up is a great way to etch BGA packages that require high-temperature acid. The BGA Alignment Plates are engineered to be able to align the sample while also offering area to press down on the sample — without touching the solder balls. This protects the solder balls from damage during the etch process. See illustrations in this section for details on how we accomplish this.
To design your own BGA Alignment Plate stack-up, start by selecting from our predefined standard collection. Once you have the BGA Alignment Plate selected, affix the BGA sample using a temporary method. Nisene suggests Kapton® tape for this purpose. Two small strips of tape on the corners of the device should be plenty. See illustration of how we accomplish the temporary affixing.
Next, select the Definition Gasket that is roughly the same size as the die (or desired area of interest; e.g. the die and second bonds). When you’re ready to etch, set the Definition Gasket on the etch head. Follow this by setting the BGA Alignment Plate and affixed device to be etched above/on top of the Definition Gasket by aligning the alignment pins with the holes on the outer edges of the Alignment Plate. Once the start button is pressed, the process cover will close and the Ram Nose will apply pressure to the backing bar on the BGA Alignment Plate.
Our BGA Accessory Kit features a variety of BGA Alignment Plates and Definition Gaskets of various sizes that are tailored to many common BGA sizes and configurations.
The Die-Down BGA Alignment Plate stack-up is a great way to etch die-down BGA packages. The Die-Down BGA Alignment Plates are engineered to be able to align the sample and work in conjunction with the Stepped Gasket type of gasket such that neither acid nor high temperature components on the system come into contact with solder balls. This stack-up protects the solder balls from damage during the etch process. See illustrations in this section for details on how we accomplish this.
To design your own Die-Down BGA Alignment Plate stack-up, start by selecting from our predefined standard collection. The Die-Down BGA Accessory Kit has many great options for this.
Next, select the Stepped Gasket that is roughly the same size as the die (or desired area of interest; e.g. the die and second bonds). When you’re ready to etch, set the Stepped Gasket on the etch head. Follow this by setting the Die-Down BGA Alignment Plate above/on top of the Stepped Gasket by aligning the alignment pins with the holes on the outer edges of the Alignment Plate.
Once you have this part of the stack-up put together on the etch plate area, carefully place the die-down BGA sample through the aperture of the Die-Down BGA Alignment Plate. Doing so will center the device to the Etch Head. Once the start button is pressed, the process cover will close and the Ram Nose will apply pressure to the back of the die-down BGA device. Typically the back of the die-down BGA device is thick metal and can easily withstand the pressure of the Ram Nose and does not require a Teflon® Blank or any other type of blank to apply pressure.
Our Die-Down BGA Accessory Kit features a variety of Die-Down BGA Alignment Plates and Stepped Gaskets of various sizes that are tailored to many common die-down BGA sizes and configurations.
Here we have a list of Accessory Kits to use in conjunction with your JetEtch Pro series decapsulation system. There is a wide variety available, and if you’re a new user you may have questions as to which ones are right for you. To inquire about our Accessory Kits, please contact us.
The Basic Accessory Kit is included with every system purchase. This kit has a ton of goodies to help you get started with etching, including several blank gaskets, different length Ram Noses, Locator Rings, and more.
Click on the thumbnail to view and/or download the PDF that illustrates the contents of the entire kit.
All items found in the Basic Accessory Kit are available on our online shop, either as individual pieces or as the kit as a whole.
The PLCC Accessory Kit is designed for the etching of the most common PLCC — or plastic leaded chip carrier — devices. This kit has an assortment of Definition Gaskets with square apertures, along with a variety of common sizes of Alignment Plates to locate the PLCC device during the etch process.
Click on the thumbnail to view and/or download the PDF that illustrates the contents of the entire kit.
All items found in the PLCC Accessory Kit are available on our online shop, either as individual pieces or as the kit as a whole.
The DIP/SIP Accessory Kit is designed for the etching of the most common DIP — or dual inline package/single inline package — devices. This kit has an assortment of Alignment Plates and Definition Gaskets for successful opening of DIP/SIP style packages.
Click on the thumbnail to view and/or download the PDF that illustrates the contents of the entire kit.
All items found in the DIP/SIP Accessory Kit are available on our online shop, either as individual pieces or as the kit as a whole.
The SOIC Accessory Kit is designed for the etching of the most common DIP — or small outline integrated circuit — devices. This kit has a vast array of Definition and Location Gaskets for many device types. It also has our Teflon® Etch Cup/Etch Cup Cap assembly, which is nice for very small packages.
This kit is one of our more comprehensive ones in terms of containing a large amount of gaskets, and many customers purchase this when they want a varied collection of gaskets in a single convenient collection.
Click on the thumbnail to view and/or download the PDF that illustrates the contents of the entire kit.
All items found in the SOIC Accessory Kit are available on our online shop, either as individual pieces or as the kit as a whole.
The QFP Accessory Kit is designed for the etching of the most common QFP — or quad flat pack — devices. This kit has an assortment of Definition Gaskets along with a variety of common sizes of Alignment Plates to locate the QFP device during the etch process.
Click on the thumbnail to view and/or download the PDF that illustrates the contents of the entire kit.
All items found in the QFP Accessory Kit are available on our online shop, either as individual pieces or as the kit as a whole.
The BGA Accessory Kit is designed for the etching of the most common BGA — or ball grid array — devices. This kit has an assortment of Definition Gaskets along with a variety of common sizes of Alignment Plates to locate the BGA device during the etch process.
Click on the thumbnail to view and/or download the PDF that illustrates the contents of the entire kit.
All items found in the BGA Accessory Kit are available on our online shop, either as individual pieces or as the kit as a whole.
The Die-Down BGA Accessory Kit is designed for the etching of the most common die-down BGA devices. This kit has an assortment of Stepped Gaskets along with a variety of common sizes of Alignment Plates to locate the Die-down BGA device during the etch process.
Click on the thumbnail to view and/or download the PDF that illustrates the contents of the entire kit.
All items found in the Die-down BGA Accessory Kit are available on our online shop, either as individual pieces or as the kit as a whole.
The QFN Accessory Kit is designed for the etching of the most common QFN — or quad flat no-lead — devices. This kit has an assortment of square-aperture Definition along with a variety of square-aperture Location Gaskets to locate the QFN device during the etch process. This kit also works with other lead-less packages like MLF, SON, and so forth.
Click on the thumbnail to view and/or download the PDF that illustrates the contents of the entire kit.
All items found in the QFN Accessory Kit are available on our online shop, either as individual pieces or as the kit as a whole.